Lesson video
Narration is AI-generated. Video chapters, transcript and sources
Transcript
Transcript
UNIT-01 asks
The robot has recognised the cup. So why is reaching out to take it actually harder? This episode is about kinematics. It does one job: it translates "where the hand should go" into "how far each joint turns".
Where is the cup: coordinate frames
First, "where". To point out where the cup is, you have to pick an origin. Without one, even "a bit further forward" means nothing. Robots often put the origin on their own base. Forward is the X axis, left is the Y axis, and up is the Z axis. Now where the cup is comes down to three numbers: how far forward, how far to the side, how high. Suddenly the position is clear. Those three numbers are its address in the coordinate frame. But careful: pick a different origin, and the same cup gets three completely different numbers. The cup the camera sees and the cup the base sees have different coordinates. So the robot is doing one thing all the time. It converts what the camera sees into the base's coordinate frame. Only when directions and origins line up does the hand know where to reach. Right, now we know where the cup is. But how does the hand get there?
From joints to hand: forward kinematics
Our arm has three joints: the base turns around, the shoulder lifts, and the elbow bends. Each joint is just one angle. The arm is like a chain, one link after another. When one link turns, all the links after it get carried along. Give these three angles, and the hand's position is fixed. There's only one answer. Working out position from angles is called forward kinematics. Forward kinematics isn't hard. Chain together each link's length and angle, and you get where the tip ends up. It always has exactly one answer. And forward kinematics is reliable. The same set of angles always lands in the same place. Because it repeats, it's easy to check. The more joints, the more flexible the motion. For example, one research robot arm has seven degrees of freedom in a single arm. More joints can get around obstacles. So if you know how far each joint turns, where the hand is takes just one step to work out!
From hand to joints: inverse kinematics
But what a robot really needs is the reverse. The cup is here, so how far must each of the three joints turn to reach it? That's inverse kinematics. The trouble is, there's often more than one answer. To reach the same cup, elbow up is one pose, and elbow down is another. Both poses put the tip on the same point. With several answers, you have to pick one. There's a bottle nearby, and elbow down would hit it, so choose elbow up. Which one to pick depends on what's around. Taking the cup, from start to finish, is See, Think, Act. See where the cup is, think out the joint angles, then the motors act and move there. How many solutions can there be? One paper writes: an arm with six joints or fewer has at most sixteen solutions. There might also be no solution at all. The cup is too far, and no matter how it stretches, it can't reach. The range an arm can reach is called its workspace. So the two directions are very lopsided. From angles to position is a straight road. From position back to angles, there are many forks, and sometimes a dead end. Open this episode's page and try it yourself. Drag the cup around the table and watch how the hand follows. You'll see a purple shadow snap into place first. That's the computed pose. Then the blue arm turns to follow it. Drag the cup far away and it turns amber: out of reach. Then switch to forward kinematics, drag the three sliders, and watch the path the hand draws. There's one thing this arm doesn't handle yet: it only works out position, not force. To really grab something, you also need to know if the grip is firm. Let's recap, three points. One, coordinate frames: first say whose origin, and which directions. Two, forward kinematics: joint angles give the hand's position, with only one answer. Three, inverse kinematics: working back from position to angles, there may be many solutions, or none. So reaching out to take it is harder. There may be several answers, or not a single one! The joint angles are worked out, but how do the motors turn there steadily? Next time, we talk about control. See you next time!
Evidence and sources
Practice and self-check
- Interactive quiz5 questions, explained as you answer
- Browser labno install: drag and tune it yourself
- One-page summaryprintable; opens in a new tab
The quiz is public and explains each answer as you go; answers to the guide's exercises are for signed-in members.
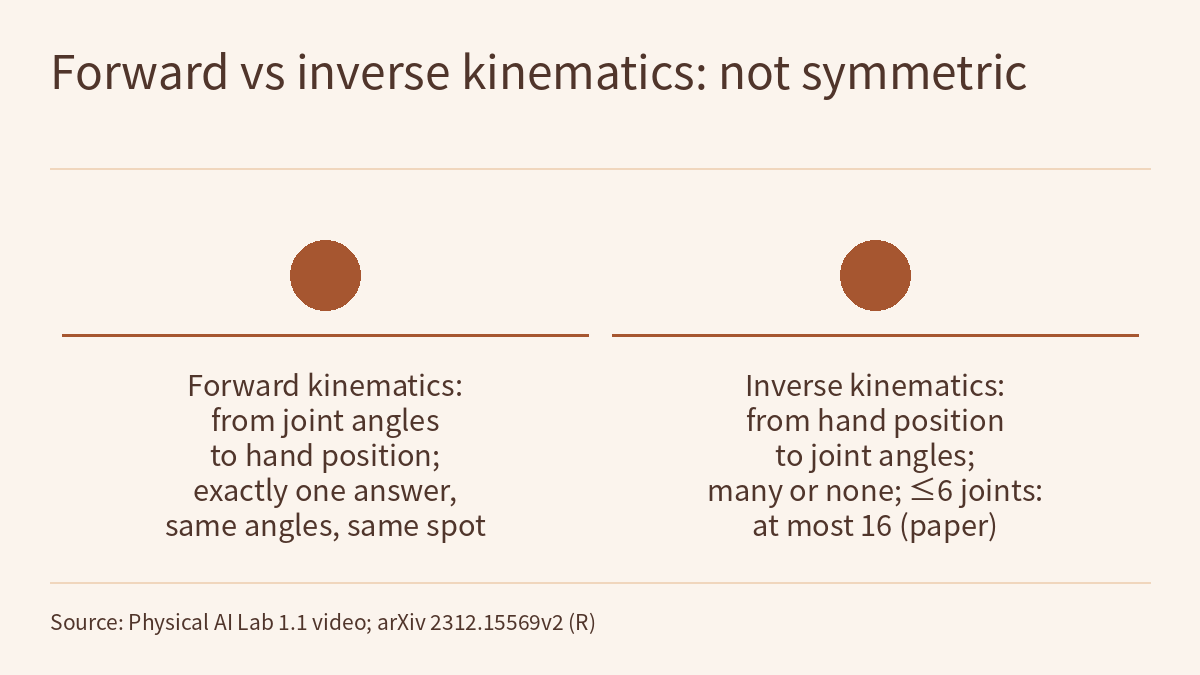
The episode 1.1 video uses “reaching the cup on the table” to teach three things. First say whose origin and which directions, and only then is a position a definite set of three numbers. Given the joint angles, the hand’s position has exactly one answer (forward kinematics). Working back from where the hand should go to the joint angles may give several solutions, or none (inverse kinematics). The video cites two pieces of evidence: a paper states that the inverse kinematics of an arm with six or fewer joints has at most 16 solutions, and one research robot arm, Franka Research 3, has seven degrees of freedom. This page is the episode’s reading and exercises. It does not repeat the transcript; instead it takes a hypothetical two-link arm and works the whole chain out by hand: converting a camera reading into the base frame, computing where the hand is, recovering two sets of joint angles, and deciding when the target is out of reach. Then it sets out what “16 solutions” and “seven degrees of freedom” each cover. One rule runs through the lesson: a piece of evidence holds only for the number of joints, the task and the object it actually describes.
The video, transcript and sources for this lesson are above on this page; the whole season is in the course outline. The previous lesson, Physical AI Lab 0.6: How to Judge Robot News — Tracing Each Question Back to a Sentence in the Source, ended by saying that next time we would go into the lab and have a robot arm reach for the cup. This episode is also part of the “think” step in Physical AI Lab 0.3: See, Think, Act — Putting Each Rate Back in Its Own System: see where the cup is, think out the joint angles, then have the motors turn there.
The five public quiz questions come with full explanations. Signed-in readers get three exercises: convert four cups from a different camera mount and decide whether each is reachable; audit a fictional solver log line by line with forward kinematics and the workspace ring; and score two solutions with the paper’s objective function, then check for a collision. Each comes with a worked solution, common mistakes and a 20-point rubric.
1. The video’s three ideas are one equation in the paper
The “16 solutions” in the video comes from an arXiv paper by Votroubek and Kroupa (Czech Technical University in Prague), Globally Optimal Inverse Kinematics as a Non-Convex Quadratically Constrained Quadratic Program (v2). Its second section uses one notation that puts all three of the video’s chapters into a single equation:
- Coordinate frames. Following convention, the paper describes each link by its Denavit–Hartenberg (D-H) parameters: offset d, link length r, link twist α and joint angle θ. Link i has a 4×4 matrix T_i, the transformation between successive coordinate frames. The end effector’s pose relative to the base coordinate system is the matrix P.
- Forward kinematics. Multiplying the links’ transformations in turn gives the end-effector pose: T_1(θ_1)⋯T_n(θ_n) = P. This is the general form of the video’s “chain together each link’s length and angle”: with every θ known, multiply out the left side and there is only one P.
- Inverse kinematics. The same equation used the other way round: P is known, find the θ that satisfy it. The paper also gives each joint limit constraints (the minimum between −π and 0, the maximum between 0 and π) and, among several solutions, picks the one with the smallest weighted distance from “preferred” angles.
Note that the paper’s P is a pose: position and orientation. The video’s three-joint arm and this lesson’s exercises deal with position only. Section 5 comes back to this.
All the exercises below use a hypothetical arm. The base angle is fixed at 0, so only the vertical plane of the shoulder and elbow matters; the shoulder joint sits at the base origin; the upper arm is L1 = 0.30 m and the forearm L2 = 0.20 m; θ1 is the angle of the upper arm above horizontal-forward, and θ2 is how far the forearm turns relative to the upper arm. These dimensions are chosen to make the arithmetic easy. They are not the parameters of the lab arm in the video, nor the specification of any real robot arm.
Sign in to keep reading: the rest of this lesson, its self-check questions and the answers.
Limitations
- arXiv 2312.15569v2 is treated as level R, and everything quoted from it is the authors’ statement. “At most 16 solutions for six or fewer joints” is a background statement in the paper’s introduction; this lesson has not traced the original work it cites, nor reproduced the paper’s solver experiments. The paper states that its implementation uses Gurobi, and that Gurobi does not return a certificate of global optimality.
- Franka Research 3’s seven degrees of freedom, position repeatability, 855 mm reach and model-library features all come from the maker’s product page: level O, self-reported by the maker, not independently verified by this site.
- The link lengths, camera mounting and all readings in sections 1 to 4 are assumptions for practice, not the parameters of the lab arm in the video or of any real robot arm; the computed angles, the workspace and the “about 0.41 m” hold only under these assumptions. This lesson has not checked the browser lab page’s implementation.
- In section 6, camera C2, cups A–D, solver X and its log, the preferred angles (40°, 60°) and (80°, −60°), the weights and the bottle rectangle are all invented for practice; the computed angles, costs, “about 63 mm” and “about 0.34 m” hold only under these assumptions, and solver X does not represent any real solver.
- Task 1 takes only the solutions on the ψ = atan2(y, x) side; without joint limits, turning the base 180° and reaching backwards may also reach the same point, and ψ is not unique when a cup lies exactly on the base axis; this lesson does not go into either. Task 3’s rectangle check looks only at the two line segments in the arm’s plane and ignores link thickness and the gripper.
- The examples solve for position only: end-effector orientation is ignored and there are no joint limits; apart from task 3’s simplified rectangle check, there is no collision detection. Calculations on paper are not hardware safety validation. As the video also says, this arm works out position, not force; to really grab something, you also need to know whether the grip is firm.
- “Elbow up / elbow down” names the solutions of this planar two-link example; with more joints and a full pose, the number and form of the solutions are different.
Links
- Physical AI Lab: a physical AI course where every number can be checked (course outline)
- Physical AI Lab 0.6: How to Judge Robot News — Tracing Each Question Back to a Sentence in the Source
- Physical AI Lab 0.3: See, Think, Act — Putting Each Rate Back in Its Own System
- Globally Optimal Inverse Kinematics as a Non-Convex Quadratically Constrained Quadratic Program (arXiv 2312.15569v2)
- Franka Robotics: Franka Research 3 product page